Food Glorious Food

Last November, I went to the filming of the semi finals of ‘Food Glorious Food’, ITV’s search for the best home-cooked dish in the UK. I was invited to attend as a WI member, and even though I was the only representative of my branch, I knew that there would be plenty of people to speak to and I had my trusty book with me in case conversation stopped (or failed to start!).

After registering, we were given lots of cups of tea and after an hour or so, were filmed arriving en-masse at our location. This was done twice, to make sure they had our best angles! Then after more tea, we were called into the dining room and we knew that eating would be imminent.

Carol Vorderman introduced the show and Tom Parker Bowles introduced his favoured dish – the Cornish pasty. He got off to an auspicious start ‘Good afternoon ladies and gentlemen’. Oops. A quick re-take later and we were ready to start tasting. As soon as we all had food in front of us, it was time to eat.

The Cornish Pasty

Eunice’s Cornish Pasty

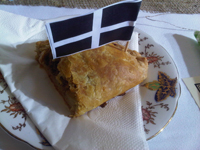
Having been glued to another cookery show on a different channel, I turned my pasty over to test for the ‘soggy bottom’. There was no sogginess, though some of the filling had leaked and this had caught. The addition of the Cornish flag was a nice touch but by now, I was peckish and started to eat. As instructed, I picked up my pasty in my hands and ate it, no Minnie Manners here!

Overall, the pastry was well cooked and not too thick. There was a good layer of potato. The meat was cooked OK (it’s here that I make the confession that I haven’t eaten beef since 1987, for fear of developing mad cow disease!) and the vegetables that were there, were well cooked. Personally, there weren’t enough vegetables for me and the meat seemed under-seasoned. It seems a bit mean to say this (as I know it’s not easy cooking for lots of people), but it was a bit bland. It was lacking something and needed a sauce or something to give it a bit of oomph. It seems a bit sad that the first beef I’ve eaten in 25 years was this, as it was an underwhelming return.

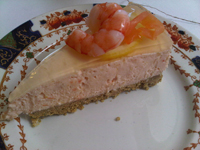
We were interviewed (I wasn’t! In fact, I didn’t make the final edit at all!) and then course number 2 was presented. I must admit, when I saw the menu, I wasn’t immediately sold by the concept of a smoked salmon cheesecake. I reserved judgement until I tried it and it certainly looked pretty when it was put down in front of me.

Donny's Smoked Salmon Cheesecake

Donny’s Smoked Salmon Cheesecake

My first impressions were that whoever cut it didn’t do a very good job, as we all had different size slices (harsh, I know) and I was baffled as to why there was a slice of lemon under the jelly.

The mousse was nice, but lacked texture – I felt that the smoked salmon could have been cut up in it, rather than have it all blitzed together. The base I felt was a bit too crumbly and dry and needed a little something. I liked the jelly layer (it was flavoured with lemon, which worked really well), but had to take the lemon slice out and then you lost the jelly around it. The king prawn also lacked any flavour at all, which was disappointing.

The dish I felt had a lot of potential and it would be great as a starter for a dinner party, but as it was, it needed a few tweaks.

Finally, we were given pudding. The provenance of the fruit was stressed by Stacie, though I wondered whether this would ring true if it were made all year round.  This was the dish I had been most looking forward to!


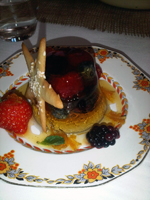
Star Bistro's Pimms Jelly

Star Bistro’s Pimms Jelly

I thought there was a bit too much fruit in my jelly and the distribution wasn’t even as my neighbour had considerably less than me. That said, to make 150 jellies in a morning was an impressive feat! The jelly needed the sauce, which added a little extra; I didn’t like the sesame seeds with the tuile star, but that’s a personal thing and I thought that the taste of the alcohol was a bit too strong.

Then, there was a summing up and impassioned pleas from the judges and it was time to vote. Cue us all leaving the hall, going next door for more cups of tea! Sadly I didn’t hang around long enough to find out the winning dish (and meet the chefs), but I was pleased when I heard on Monday that the jelly was the overall winner. It was the best dish, I think the best fit (of the 3) with M&S and it did say Modern British cooking to me, which is what I think this programme was trying to achieve.

Would I buy the jelly from M&S (assuming it wins – I have no idea which dish wins by the way!)? I’d try it to see how it resembles the jelly we tried. I’d certainly try making it. I’d also try making the smoked salmon cheesecake, but with a few tweaks. I haven’t eaten any Cornish pasties since filming, though I have eaten beef again and on more than one occasion!

It was an enjoyable day out, meeting fellow WI members and swapping stories and I’d definitely do it again if asked. I don’t think I’d enter the competition though!

Finally, if my judgements above seem harsh, I am sorry. I was trying to be honest. I wouldn’t normally eat a pasty (or meat pie), so I found that hard to judge. Whilst I enjoyed the food in front of me, I did think at the time how each dish could be tweaked and improved and I think if you enter a competition, you don’t necessarily want everyone to say how lovely it is, you want someone to be honest with you and say what worked and what didn’t. Also, these are just my opinions. The lady opposite me thought the Cornish pasty she had was the best one she’d ever tried and that was her favourite dish of the day. All we can do is be subjective and honest.

Congratulations to all of the contestants for getting to the semi-final, that’s a great achievement and I shall be hunting out the best dish in my local M&S in the next few weeks!
Pork Pies

pork1 I love a pork pie, especially at Christmas, when they’re topped with cranberries. I’ve never made them though; I don’t know why, I just haven’t. I remember watching ‘the Great British Bake Off’ a couple of years ago and the contestants were making hot water crust pastry. I’ve never made that, or puff pastry. In fact, the only pastry I’ve ever made is shortcrust, both savoury and sweet. So, when I had the opportunity to go to Norfolk recently and make pork pies, it only seemed right that I should go.

Sarah Pettegree started ‘BraysCottage Pork Pies‘ in north Norfolk and now sells her pies in local  markets and in pubs and delis, all over the county and further afield too. Just occasionally, she opens the doors to pie hq and lets unsuspecting members of the public in and teaches them how to make the perfect pork pie. For one thing, it doesn’t contain jelly. This is something of a relief to me as I wasn’t sure it was something I wanted my pie to have.

Sarah was very welcoming and as soon as I had arrived, she put the kettle on and the hob for the bacon sandwiches. When we had all gathered in her kitchen (I still can’t believe it’s as small as it is!), we were shown how to make the pastry and we were then let loose. I tried a dolly as there were some on the side and I wanted to at least have one attempt. It actually took two for me to have something that resembled a pie case and I moved it to the fridge speedily, lest it should break!

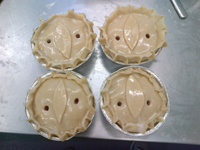
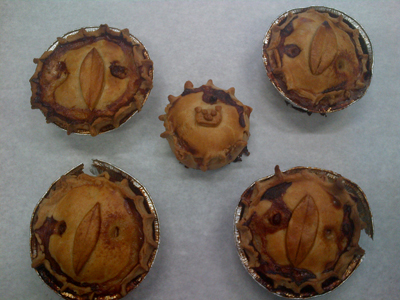
The filling in the pies was a mixture of pork loin and shoulder, which her local butcher minced for her and we added some smoked bacon and assorted herbs and spices. Sarah kept her special mix a secret and I experimented with nutmeg, mustard powder and sage, which I had thought was thyme. When I was happy with the seasoning, it was time to fill the pies and then decorate them. This was something I could do! Leaves for my big pies, faces for my little ones; yes, I was making piggy pies!

As soon as they went in the oven, it was time to eat. Who knew that pie making could be such hungry work? After an hour, they were done, a quick blast in the cooler and it was time to take my pies and face the long drive home.

I spent such an enjoyable time in Norfolk and I now feel confident I could replicate my pies. I had some leftover pastry, which shamefully (though not unexpectedly!) is still sitting in my freezer. I intend doing some sort of vegetarian pie, possibly with spinach or butternut squash. One day… I will definitely be leaving the pie making to Sarah and her wonderful team however, and will gladly stick to cakes.

If you’re after an unusual gift, this is a great idea; in fact, the workshop was a Christmas present gift from generous spouses for most of the group.

The pie itself? Whilst I still have to taste one of Sarah’s, hand on heart, it’s probably the tastiest pork pie I’ve had. I knew exactly what went in it and it was made with love. Especially the little ears.

pork2

Kiwi Syllabub

kiwi_syllabubFor some reason I don’t quite know (I do know; I eat too much!) I’ve given up cakes for Lent. And biscuits. And chocolate. And alcohol. I have given myself a caveat though; if I’m recipe testing, I’m allowed to eat a cake I’ve made. Phew!

My sweet tooth has rather taken over of late and I’m already struggling to get through the day without anything. I’m very much a boredom eater and I’m trying to retrain myself to eat fruit, yoghurt or nuts rather than reach for the biscuit tin. I’m doing OK, but it’s puddings I’m now missing. That ‘something nice’ to finish a meal.

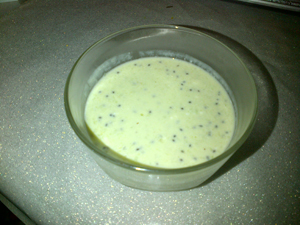
I’m thinking of ways to get round this by trying to define what a pudding is. I’ve so far had a baked apple, filled with mincemeat. I don’t view this as a cake. I’m going to get myself a pineapple the next time I do a shop and sauté it as that doesn’t seem to be a cake. And yesterday? I made myself a kiwi syllabub. I have lots of kiwi fruit (the retraining isn’t always successful!) and rather than use cream, I’ve used Greek yoghurt, so I’m not breaking any rules.

Over the next 5 weeks, I have rice pudding to look forward to (made by me!), stewed fruit, compotes, roasted rhubarb, the odd jelly (juice and gelatine can’t be cake, surely?!), and anything that takes my fancy, but is predominantly fruit.

And as for the kiwi syllabub? Yum. To finish it off, it would be great served with a nice shortbread biscuit, but I put that idea right out of my head! If you fancy trying it, here’s how:

Kiwi Syllabub

2 kiwi fruit

1 tbsp caster sugar

squeeze lemon juice

3 tbsp Greek yoghurt

Method

Peel the kiwi fruit and blitz in a blender. Add the sugar and stir well. Add the yoghurt and lemon juice. Stir well, place into your serving dish of choice and refrigerate until you’re ready to eat.

That’s it! It’s that simple! And the above is for one. Just increase quantities for more.

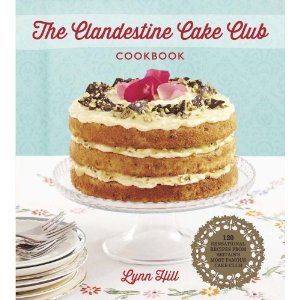
The Clandestine Cake Club Cook Book

cccThe Clandestine Cake Club Cook Book is out on 14 February 2013. It’s a lovely book, full of lots of cakes (as all cook books should be!).

For those of you who are unaware of the Clandestine Cake Club (and shame on you!), let me tell you a little about it. Just over 2 years ago, Lynn Hill, a lovely lady from Leeds, organised the first meeting of the ‘Clandestine Cake Club’. Her idea was simple, get people baking cakes again. Not cupcakes, not traybakes or biscuits, but cakes. The rules are simple, it has to be a cake and must be able to be cut into at least 8 slices. You are told where the venue is just before the meeting takes place and then you go along, with your cake, chat to other bakers and eat lots of cake. When you’ve all sampled each others’ goodies (and no doubt eaten far too much!), you then take any uneaten cake home that you fancy and gorge the following day! The whole experience is repeated monthly. It’s marvellous!

The Clandestine Cake Club has spread not just nationwide, but worldwide too. If there isn’t a club near you, it’s very easy to start one and it’s a great way to meet people, who already have the love of cake in common.

Not content with being the driving force of this phenomenon, Lynn has, along with Quercus Books compiled a cookery book from the recipes of the members of the clubs up and down the country. And the result? A beautifully presented 256 page book, full of the tastiest 120 cakes around.

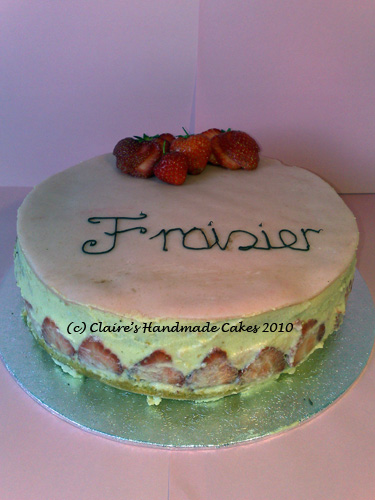
I am, of course, more than slightly biased, because one of my cakes is in the book! I first made a ‘Fraisier’ a couple of years ago. I’d seen it in France and fancied making it, so I did! It wasn’t an easy cake to make, it is time-consuming, but it really is worth it.

fraisier_sIt’s a great ‘occasion’ cake; if you’re having a dinner party, or friends over for a special celebration, this is the perfect cake for you.

It really encapsulates the spirit of summer and is a perfect use for fresh strawberries. Of course, you could always use raspberries (and then you’d have a ‘Fromboisier’) and I had one in Toulouse with pears (which was just divine).

Well, I’m not going to review my cake, but rather the book which it’s in. There are chapters to tantalise even the most discerning of tastebuds; Classic Cakes, Fruity Cakes, Global Cakes and Chocolatey Cakes are just some of those on offer.

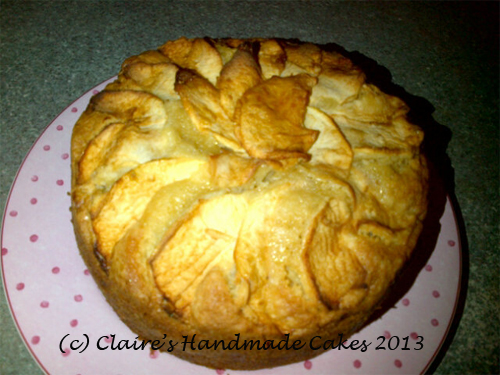
Today I made a Dorset Apple Cake, by Karen Burns-Booth I’ve been on the hunt for an apple cake for a while and this one is moist and appley. It’s delicious both just out of the oven and cold. It’s also great with fresh coffee and rose wine, should you wish to have either (or both!) with it!

If you wish to buy this wonderful book, I heartily recommend it (as I would!). It contains an assortment of cakes to take you through the seasons as well as any event when one could possibly want a cake, or just on those ‘just because’ days!

And as for the apple cake, here it is in its glory and just before I tucked in!

apple_cake

Hygiene and Social Media

I tweeted the following this morning: ‘Little tip: if you own / run a food business, please don’t tweet / FB that you have a stinking cold, but are about to go and cook / bake’

It seemed to generate quite a bit of feedback and it got me thinking about how we, as small businesses, use Twitter and social media. The comment stemmed from something I read on Facebook this morning. The owner of a cake company wrote that they had woken up with a terrible cold, but was going to don their apron and carry on baking.

I love Twitter (more so than Facebook, if I’m honest) and I love the immediacy of social media. I do think sometimes that people misunderstand the concept of social media however. Perhaps they have made friends with some of their followers (and some of their followers are their friends) and they then forget that other businesses and even customers also follow them and read their thoughts and conversations.

Twitter (and Facebook) isn’t an excuse to have a chat with your friends, not if you’re posting as your business, at any rate. It’s a way to sell yourself and your business. To show the human side of what you do. Yes, by all means share amusing stories and anecdotes. If you’re having a bad day a virtual hug can be a great pick-me-up. But some things really don’t need to be shared!

You want people to come to you and buy your food, then, hopefully to come back and recommend you to all of their friends.  By sharing with the world that you’re full of cold (or even worse, as I was told today, that you have a mouse infestation!), your customers are not building up a great picture of you. Would I go to food business if I knew that the person preparing the food was ill? It’s unlikely. I want to support local businesses, but not to the detriment of my health!

Similarly, there is no way I’d ever go to a business if I knew that they had mice or cockroaches. If you are unlucky enough to have either, shut up shop immediately, call your EHO, get the problem dealt with and learn the lessons as to why they came, so that they don’t come back.

However, PLEASE don’t tweet about this, or share it with the world. You will damage your reputation and possibly your business as well. By all means share the experience once it is over and use it as a lesson learned, but do be careful how you share your news.

There is such a thing as too much information and before you next hit the ‘send’ button, think:

Why am I saying this?

Who will be reading it?

What impression does it give of me?

If you can answer the above positively, then yes, press send. If not, then maybe have a rethink. Twitter and social media are great tools, but you have to use them well.

I would like to conclude that if you’re ill (you’re full of cold, you have the flu, a stomach ache, food poisoning, diarrhoea, or something contagious) then you shouldn’t be in a kitchen or preparing food for other people to consume.  If you find an infestation of any kind, you should close immediately and contact your local EHO for advice and who to contact at pest control.  I’m not in favour of covering anything up and please do have consideration for your customers. If they fall ill, you’re liable. Also, would you want to eat somewhere which had mice in it and where the owner was snotty-nosed whilst preparing your food? I thought not!

Let’s Make Chocolate Christmas

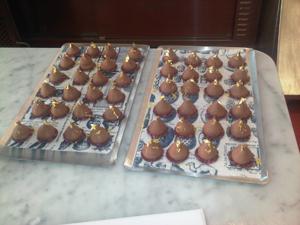
I was recently invited to Let’s Make Chocolate Christmas (this may not have been its real name!) by Vanessa Kimbell. The amazingly talented (and very lovely) Chantal Coady let us loose in her Rococo chocolate factory. We started the afternoon with hot chocolate, her master chocolatier Barry then demonstrated how to make goats cheese ganache, how to temper chocolate and gave us all lots of tips and advice.

choc_tools


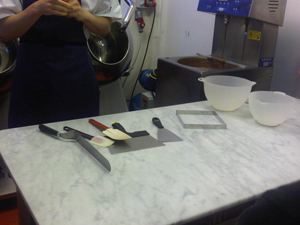
Barry gave us all of the tools for us to temper chocolate with – a marble table, plastic bowls, a ‘bent’ palette knife, rubber spatulas and essentially a wallpaper scraper and wall skimmer! I have some of these objects, but clearly a trip to my local DIY shop is in order!

The beautiful (and delicious!) chocolates from Chantal’s goats cheese ganache recipe:

goats_cheese_ganance


Once a few of us had had a go at dipping chocolates (and we’d all tried the ganache and chocolates on offer), it was time to swap our gifts (and find out who had won the prizes for the best chocolates on show!)

Shamefully, I didn’t pay close enough attention as to who won what (my friend had arrived with her baby and I was cooing!), but congratulations to all those who had won. The standard looked very high and everyone had made a tremendous effort.

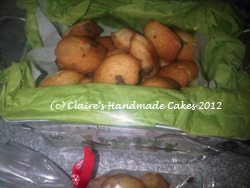
I made sea salt chocolate madeleines from Chantal’s stunning new book and a black forest roulade/log.

I left with some truffles, an amazing goody bag from Chantal and her fabulous book, which I can’t recommend highly enough. I can’t wait to play with chocolate and made more goodies from it!

madeleines

Viennese Whirl Biscuits

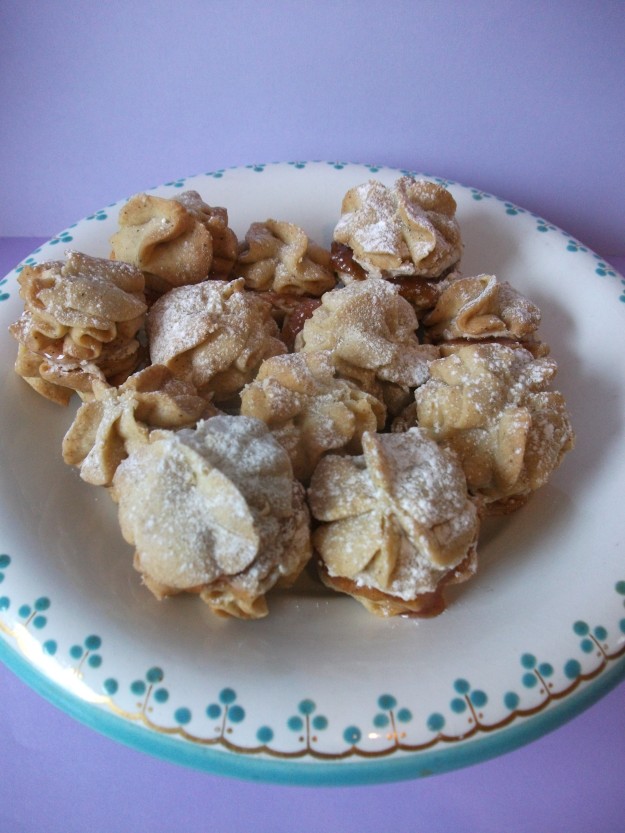
The last of my baked goodies for the Vanessa Kimbell / ndali vanilla gift swap. I’ve made something similar to these before, but they failed miserably, basically because they did not hold their shape. They tasted good, but just looked rubbish and no-one likes a rubbish-looking, misshapen biscuit! I didn’t have the best nozzle in the world (I have lots of small nozzles, but my larger ones leave a little to be desired. Consequently, it’s something I need to put on the Christmas list!), so I made do with what I had!

I have taken advice from Mary-Anne Boermans and I froze my dough, albeit briefly. The idea behind this was so that the biscuits kept their shape and looked pretty. It worked! She is a baking genius!

Biscuit ingredients

250g soft butter

55g icing sugar

55g corn flour

250g plain flour

1tsp ndali organic vanilla powder

For the butter icing

100g icing sugar

200g butter

1tsp ndali organic vanilla powder

Plum and vanilla jam (see post of 23 September)

Firstly, make the dough. Beat the butter and icing sugar together until pale and fluffy. Unless you have super strong arms, use a whisk or food mixer.

Sift together the flour, cornflour and vanilla powder and add to the mixture. Mix until smooth.
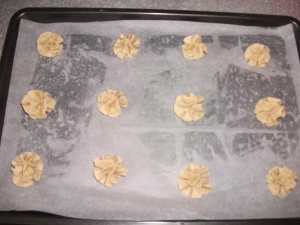
Put a large star nozzle (or something which looks similar if you don’t have one!) into a piping bag and then spoon the mixture in. Pipe swirls onto a baking tray which has been lined with greaseproof or parchment paper (as you are going to put this into your freezer, use a tray that will fit it). You should aim to have them all the same side as you will be sandwiching them together.

Put the baking tray into your freezer for 15 minutes. Meanwhile, preheat the oven to 180C. (As my oven is a very hot fan, my oven was set to 150C).

Remove the tray from the freezer and bake the biscuits for about 12 minutes, or until they are a pale golden-brown colour.

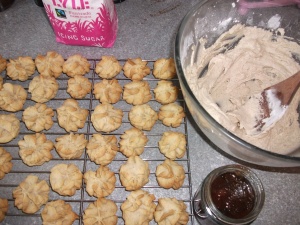
Leave the biscuits on the tray for a few minutes, then move to a wire rack to cool completely.

Whilst the biscuits are cooling, make the butter icing. Beat the butter, icing sugar and vanilla together, until smooth and fluffy.


When it comes to sandwiching the biscuits, you can pipe the butter icing, or just use a small palette knife and spread over one of the biscuits. Spread a little of the plum jam on the other biscuit and put together gently. Sieve a little icing sugar over the top and enjoy.


Ndali and Fairtrade Baking

I’ve been a fan of fairtrade ingredients for a number of years now. If I have the choice of a fairtrade over a non-fairtrade one, I’ll always go for the fairtrade one. I like to think I’m fairly well educated about what I put in my trolley and what I use in my cooking. I’d done some research into fairtrade ingredients and they offer opportunities to farmers and producers to have a better life.

Vanessa Kimbell recently went to Uganda to see how Ndali grow their vanilla and to see the effects of being fairtrade producers. This was subsequently featured on Radio 4’s ‘Food Programme’ and it was fascinating, as the growers and farmers were interviewed and said what being fairtrade meant to them. It was also the first time that I realised just what went into producing vanilla as I’d never really thought about where it came before. I sometimes see pods in the supermarkets and think ‘Crikey, that’s expensive,’ but had never known the process from seed to supermarket.

Vanessa organised the ‘Ndali Vanilla Gift Swap’ at Fortnum and Mason, in association with the Fairtrade Foundation to celebrate the launch of the Fairtrade Bake. All of those who participated, were sent Ndali vanilla pods and Ndali vanilla powder. We could enter up to three products in 4 categories – cakes, biscuits, preserves and sweets.

I made some Viennese whirls, which I filled with plum and vanilla jam and vanilla buttercream and I also made some hazelnut, chocolate and vanilla cupcakes, with a whipped vanilla ganache icing.

It wasn’t exciting enough that we could talk to lots of lovely people and take someone else’s goodies home with us. Vanessa had arranged for Lucas Hollweg, Chantal Coady and two of the buyers from Fortnum & Mason to taste everything. The lovely (and very generous!) Kenwood and Fortnum & Mason had supplied prizes and Chantal also offered a class at her wonderful Rococo chocolates.

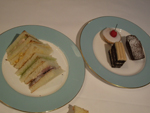
Fortnum & Mason had provided tea, coffee, sandwiches and cakey treats for all of us. They looked amazing, but a few months ago I gave up wheat and so I asked whether it would be possible to have something without wheat. I was looking enviously at the food on offer and knew I’d be peckish before I went home.

Time went on, I was chatting to lovely people and I’d given up hope on eating. I was also starting to feel more than just a tad peckish. Imagine my delight, when a lovely waiter from F&M came up to me with these two plates. The sandwiches had been lightly toasted and had had their crusts cut off (as all good sandwiches should!). I didn’t manage to eat everything (it would  have been very gluttonous!), but I was so touched by the thought and my tummy was very happy too!

So, as I was tucking into my sandwiches, Vanessa stepped to the front and told us all about her experiences in Uganda and the generosity of Lulu Sturdy (Ndali’s owner). We all felt moved by Vanessa’s tales and I knew that my support for fairtrade ingredients was absolutely the right thing and I will continue to use fairtrade ingredients in my baking wherever it is possible.

Before I knew it, the prizes were being awarded. There were some fabulous looking goodies around and I was sure that they were going to taste delicious too. I was pleased with what I had made, but the competition was fierce!

I was so chuffed when I realised that my cupcakes had won a ‘runner’s up’ prize in the best cakes and cupcakes category. I wasn’t convinced that the vanilla taste was there, but I thought that they did taste good and so I hoped for the best! As mentioned above, the lovely people at Kenwood very generously donated all of the prizes and I can’t wait for my new toy to come along, so I can have a play.  I already have a Kenwood k-mix food mixer (which is not only a thing of beauty, but a joy to work with as well), so I’m super-dooper excited to be having a new addition to my kitchen gadgetry!

When it was time to leave (after we all congratulated the winners and consoled those who didn’t quite make it on this occasion), it was time to swap gifts and go home. Just before we left, we were given a goody bag from the Fairtrade Foundation, which included some Green & Black’s cooking chocolate, some almonds, apricots, raisins, cardamom seeds, cinnamon sticks, a Divine Chocolate cookery book and a Delicious magazine cookery book too.

I’ve already used the apricots and raisins – I made some Christmas cakes today. I’m also going to make some fig and vanilla jam in the next few days and I have to think of a use for my cinnamon sticks and cooking chocolate, but I’m thinking that either raspberries or cranberries may feature.

I would like to thank Lulu from Ndali for my fabulous vanilla, to Fortnum and Mason for not only being superb hosts, but for providing me with an excellent afternoon tea, to Kenwood for my shiny new toy, to the judges for giving up their afternoon and ‘having to eat’ lots of cake, to the Fairtrade Foundation for the yummy goody bags and finally, to Vanessa for organising such an amazing afternoon. I had such a fantastic day out and realised that the simple choices that I make in a supermarket can (and do) have a feel impact on lives in other parts of the world.

If you feel like baking in the next week, why not make it Fairtrade and take part in the Big Fair Bake? You’ll have something yummy to eat and be making a real difference to the lives of people who don’t want charity, they just want a fair deal.

Gluten free chocolate, hazelnut and vanilla cupcakes

This is the first of my 2 recipes from the Ndali Vanilla gift swap that I attended at Fortnum and Mason on 24 September 2012. It’s also the one I won a ‘runner’s up’ award for the ‘best cake or cupcake’. It was unexpected (there were some fabulous looking baked goodies!) and I was very proud! I got a bit carried away when I was baking and took lots of photos, but it’s nice to see what you’re doing, isn’t it?!

I saw somewhere ages ago, someone offering chocolate, hazelnut and vanilla cupcakes. They sounded interesting and something I wanted to try. Last Christmas, I made something similar – chocolate and hazelnut cupcakes and they went down very well. So, I revisited my recipe (once I found it from my ‘wonderful’ filing system!), tweaked it and the following cupcakes materialised!

I gave up wheat at the start of summer and I feel so much better for it. Occasionally I’ll eat it, as I have no reason not to eat it other than I don’t want to, but I am trying to bake and eat without wheat as far as I can. That’s another reason why I love these cupcakes. Most of the nuts I use in my baking are almonds, so it’s great to find another one to use! One day I’ll get round to making this as a big cake, but in the meantime, here’s the recipe I have adapted from ‘it pleases us

I added vanilla to the cupcakes and I have made a whipped ganache icing, which I think really works well. I also dipped my hazelnuts in chocolate before using them to top my cupcakes, just to make them that little bit prettier!

Finally, just before I get to the recipe, I wanted to add (as I haven’t stated it anywhere else!) that the chocolate, the hazelnuts, the sugar and the vanilla that I used were all fairtrade products. Using fairtrade products is something which is incredibly important to  me and when I post my write up of the gift swap, I’ll explain why. For now, happy baking!

Chocolate, hazelnut and vanilla cupcakes

Makes 9

70g dark chocolate, chopped

50g butter, chopped

2 eggs, separated

60g caster sugar

50g ground hazelnuts

1tsp ndali organic vanilla powder

For the icing

120g dark chocolate, finely chopped

90ml double cream

1tbsp caster sugar

1tsp ndali organic vanilla powder

9 whole (or half) hazelnuts

10g dark chocolate

Firstly, make the cupcakes. Put cases into your cupcake tray and preheat your oven to 150C. (NB, I have a very hot fan oven, so this is the temperature I used. If your oven isn’t a hot fan, I’d suggest using 170C.)

Put the chocolate and butter into a bowl and place over a pan of barely simmering water. Stir until both have melted together. Allow to cool slightly.

Whisk the eggs and sugar in a bowl until thick and creamy. This will take several minutes. Add the chocolate mixture and whisk to combine.

Add the ground hazelnuts and vanilla and stir until well mixed. (To get ground hazelnuts, I used a coffee grinder and blitzed whole ones.)

With a whisk, beat the egg whites in a spotlessly clean bowl until they are of stiff peak consistency. Add 1/3 of the egg whites to the chocolate mixture and stir carefully. Then add the remaining egg whites and fold carefully until just combined. You don’t want to lose all the air you’ve just created!

Spoon the mixture into your cases and bake for about 20 minutes. The best way to describe if your cupcakes are ready, is if you insert a skewer or sharp knife into one, it will come out still a little bit moist.

Leave the cupcakes on a wire rack to cool completely before icing.

Whilst the cakes are baking, start on the icing. Put your finely chopped chocolate into a large bowl. (You are chopping it finely so that it will melt easier – you don’t want lumps of chocolate in your ganache!)

Pour the cream into a pan and add the sugar. Heat gently until the sugar has dissolved and then increase the heat and bring to the boil. Remove from the heat and stir in the vanilla. (When I did this, I used 1/2tsp vanilla and although I could taste it in the cream, I couldn’t taste it in the finished ganache, so I would recommended that you use more vanilla.)

Pour the cream mixture onto the chocolate and beat quickly until the chocolate has completely melted. Leave to cool completely. (This is the cooled ganache, just before I whisked it; it’s my ‘before’ shot!)

At this time, melt your remaining chocolate in a small bowl over a pan of water on a very low heat. Then, dip your hazelnuts into the chocolate and allow to cool.

When the ganache has cooled completely, get your whisk out and on a high setting, whisk the ganache until it has a very pale colour and is of a light and smooth consistency. This will take several minutes. (This is the ‘after’ shot – what a difference a whisk makes!)

At this point, put the icing into a piping bag and pipe onto the cupcakes. (If you make your icing before you’re ready to pipe, whisk for a few seconds before you put into your piping bag, as it tends to go hard otherwise.) Place a hazelnut onto the top of each cupcake and enjoy!

* Edit. After pressing ‘publish’ I realised that not everyone will be as confident with piping as I am. To get the swirl on my cupcakes, I used a Wilton 1M nozzle. It’s a great nozzle as if you pipe from the outside of the cupcake to the centre in an anti-clockwork motion, you get a swirl and if you start from the centre of the cupcake and pipe in a clockwise motion, you will pipe a flower. The piping bag I used is a reusable bag, though you can buy disposable ones from cake decorating shops, the internet etc.

You need to pipe when the icing has just been whipped, though be careful as the heat of your hands will melt the ganache towards the end (you may notice that cupcakes 7, 8 and 9 did not make the final photograph!).

If you don’t have piping bags and fancy nozzles, then a palette knife, or simply a small knife will be fine.

Finally, if you don’t use all of your icing, pop it back into your fridge and after an hour or two, you have vanilla truffles. Yum!

Plum and Vanilla Jam

Hello! You may have noticed that summer is over and I’ve been a bit quiet of late. Well, for the duration of summer actually! I’m sorry about that. I have been busy and I have been working, I just have been doing it very quietly! I hope to be a bit more vocal in the autumn and winter and certainly in the next few weeks, I’m sure I’ll more than make up for months of silence!

You may remember last Christmas, when the very lovely and talented Vanessa Kimbell organised ‘Let’s Make Christmas’ at Fortnum and Mason? (To refresh your memories, I made some amaretti biscuits and won a Kenwood food processor and a Fortnum and Mason Christmas hamper!) Well, she’s done it again! Vanessa was recently in Uganda and on her return, has highlighted the plight of vanilla producers and has championed ndali vanilla

So, to get people using ndali vanilla and to bring awareness to their wonderful produce, Vanessa has organised a vanilla gift swap at Fortnum and Mason tomorrow.

So, it stands to reason that I should join in. I love baking, I adore vanilla and meeting fellow bakers and bloggers is always fun. So, what could I possibly make? I’ve decided to make some chocolate, hazelnut and vanilla cupcakes, with a whipped vanilla ganache icing and some Viennese Whirls, filled with a vanilla buttercream and plum and vanilla jam. If I’m going to celebrate vanilla, I’m going to make sure I use a lot of it!

Today, I’ve made the jam and the ganache. I’m not entirely convinced that either have enough vanilla, though I thought I was being generous! I imagine (I hope!) that by the time I’ve made all of the constituent parts, that they will all be sufficiently vanillay, and hopefully I’ve not gone for overkill. There’s a line between not having enough and having it so strong that it’s all that you can taste. I’d like not to cross that line!

So, today I’ll share my jam recipe. Over the next few days, the recipe for the biscuits and the cupcakes as well as my thoughts of the day will follow. After that, I’m hoping to rediscover my love for this blog and I’ll share more thoughts and recipes with you all.

Plum Jam (enough for 5-6 7oz jars)

1 kg plums (I used Victoria)

800g sugar

2 Ndali vanilla pods

300ml water

Begin by ‘preparing’ your pan. Before I make jam, I always wash my pan in hot, soapy water. Once it has dried, I then melt some butter (enough to coat the base of the pan). This helps to stop the jam from sticking to the base, which also makes washing up easier! Then, pre-heat your oven to 120C and once you have done this, place a small saucer into your freezer.

Rinse the plums in water, then halve and stone. Cut in half again and put into your prepared pan. Add the water and the vanilla pods. Before you add the pods, score one lengthways and open up to reveal the seeds. Scrape these out using a sharp knife and add to your pan. Cut the pod in half (so that you can later add this to your jam jars) and repeat for the other vanilla pod.

Put the pan on a low-medium heat and leave for the fruit to soften, which will take about 20 minutes.

In the meantime, prepare the jam jars. Start by washing your jars in hot soapy water. Then rinse them in hot water and place in your pre-heated oven. Ideally, you need to leave them for between 15-20 minutes and this will sterilise them.

Once your jars are in the oven, your plums should be nicely softened and you are ready to add the sugar. I have used granulated sugar. You could use vanilla sugar if you choose; as I’ve only just thought about this, I didn’t! You can warm your sugar to help it dissolve. You don’t have to do this and it’s not something I always do, but I do sometimes. (If you wanted to do this, weigh your sugar out, and then pour onto a large baking tray. Put in the oven on a low heat – no more than 100-120 degrees – and leave for about 5 minutes. You don’t want to cook the sugar, all you want to do is warm it up. Remove from the oven and then add to your pan.)

Put the sugar into the pan and stir occasionally. You don’t want to turn the pan up – you want to leave it at its low-medium temperature. Before you start to boil the fruit, you want to ensure that the sugar has fully dissolved, otherwise you will be left with a very grainy jam. It will take somewhere between 5-10 minutes for the sugar to dissolve fully. Once you are sure that there are no little grains of sugar in your jam, turn up the heat. I had my hob at 4 for this (it goes up to 6) and I felt that was high enough. You want your jam to come to boiling point and then to boil for about 5-10 minutes, but you don’t want your jam to burn and I feel that by having a slightly lower temperature, I’m more in control.

Once you have turned the temperature of your jam up, you need to watch your pan like a hawk! Stir occasionally too. After about 5-10 minutes, take the jam off the heat, remove the saucer from the freezer and then test your jam. Take a teaspoon of jam from the pan and put it onto your saucer. Leave for about 20 seconds. Then, push the jam with your finger. If you notice that when it moves it starts to wrinkle a bit, it’s ready. If not, return to the hob, return the saucer to the freezer and try again after a couple of minutes.

When your jam has wrinkled, you can turn your hob off and you’re ready to pot the jam! Before you do this however, move your pan to your work surface. You may notice that there is a light ‘skim’ on the surface of your jam. If this is the case, stir a small knob of butter into your jam and this will disappear. Leave your jam for a couple of minutes before you jar it. This will ensure that when your jam has cooled, the fruit hasn’t all risen to the top, but remains evenly dispersed throughout your jam.

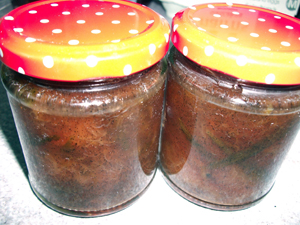
Remove your jars from the oven and you’re ready to jar the jam! You can use a funnel, but I tend to use a tablespoon and just spoon it in. As you’ve cut your vanilla pods in half, try and get a pod in each of the jars. Once you’ve reached the top of the jar (you don’t want to go right to the top – leave a gap of about 3mm), I always place a waxed disc before sealing. This isn’t always necessary, especially if you’re using new jars, but if you’re using second hand jars, it is advisable. (As an aside, if I were making plum chutney, I would always use wax discs, so the vinegar in the chutney does not react with the lid.)

Place the lid on the jam and then screw. Once the jam has cooled, you can tighten the lid and voila! Your plum jam is ready!

(Another quick aside. You can and probably should, remove the skins from your jam before you bottle it. As I went to remove one, I noticed vanilla seeds all over it and I thought it would be criminal to take them out. So, although when the jam is cool and I go to eat it, I won’t eat the skins, in the meantime, I don’t think it will do any harm to add a little more flavour to my jam. It’s really up to you though, whether you remove the skin before you jar your jam, or later, when you eat it.)

I’m not going to enter the jam in the gift swap (I only have 3 jars of it!), but I will use it to sandwich my Viennese Whirls together and I’ll post the recipe for that over the next few days.